Pages

Tuesday, September 6, 2016

Complete Slacker: Building Ingmar Spijkhoven's KrAZ 255B

Somebody may be saying, "Hey, where is that guy who builds the models for fun?".  I'll tell you.  I've been working on the other end of my hobbies, namely gaming.  In other words, slacking off.  But here is something that jumped out a few weeks back that is almost like building a model:


I found this on the internet, I think I typed in "Crazy", but got directed to "KrAZ", which is a form of Russian Krazy.  I have a number of these in various scales and love this video: https://www.youtube.com/watch?v=AcPvHobX3D0    And this one...  https://www.youtube.com/watch?v=ium7Cxn3TN4

I bought the plans from MOC (My Own Creation) ((WARNING, do not start looking at Lego stuff)). We had bins of old Legos and I thought hmmmm....


So, here I am sorting through bins of old Legos...I found a lot of cool stuff like some petrified Cheerios and lots of long hair.  I sorted first by color.  I limited myself to the colors used in the model, Red, Dark Blue Gray, Light Gray and Black.  If you want to replicate this experience at home, but don't have several bins of old Legos laying about, simply do the following: 1) Take a 2,000 piece jigsaw puzzle and have several small deranged children hide half the pieces around your house.  2) Take the remaining pieces and throw them in the garbage.  3) Now go find the 1,000 puzzle peices scattered around your house. 4) Figure out which pieces are missing.  Document each one.  Contact the puzzle manufacturer for replacements. 5) Assemble.

I think this is a metaphor for something.  Guantanamo Bay?


Here's most everything sorted.  It's an insidious hobby, playing on our base compulsion to organize crap into neat piles.


The next bit of business is to order all the parts I don't have.  Each must be selected individually by shape and color.  Why on god's green earth do they make Dark Blueish Gray and Black indistinguishable?  This took about 3 hours.  OK, 4.  It is an exercise in extreme tedium, there are 8,000+ elements in 53 colors. After a while they ALL LOOK THE SAME.


While patently waiting for my parts to come in (most are from Denmark), I dug out an old kit and decided to do a practice run.  In case I forgot how to snap bricks together.  Turns out it was easier than remembering my cell number.


Took about an hour.


On Friday everything but one part (from Lego!) showed up.


First thing is to make sure I got what I ordered.  So I rechecked everything off the list.  I got 4 parts in the wrong color (dark blue, my mistake) and forgot 4 parts.  It's a rare piece, but miraculously was able to find four of all the same (but wrong color) in the bins.  Oh my god, I have lost my mind.


Here it all is.  I am sure that some day this picture will resurface when I am trying to deny one of my many highly honed character flaws.

Can't wait to build this thing.  Part two....We build.  Cheers!

Friday, May 20, 2016

Royal Foogleeian Mobile Armored Throne

I built this for my FRPG Crypts-N-Creepies on my other "cooler" blog:
http://crypts-n-creepies.blogspot.com/


Yes, this not even a thinly veiled shameless plug:  Rack my counter up.  Please hit the various orange G+ buttons (there are two kinds, one for the blog in general, the other at the bottom of the post).  Obviously, don't press these but tons (he said "butt") if you think the post/blog is crapp.  Or maybe you like pushing buttons. By pushing them you help drive my blog/post up in feeds that people have and ultimately aid me in my plans to rule the world.  Just push the buttons.

Friday, May 13, 2016

Nothing Mediocre!

Massive Voodoo is posting the Mad Max entries.  GO!
http://massivevoodoo.blogspot.de/
Here is a sampling...


What a great mass of models!


Monday, May 2, 2016

Building the PKking Dark Elf Queen Part 3

Attaching Your Queen To A Base:

No Fit.
In this case, for this model, I need to get the skirt fitted on before I attach her to the base.  The skirt is large, thin and comes in two sections.  Here we see the left side.  This section does not fit (no surprise), because it is a thin part. Thin parts never stay the same shape as the master for a number of reasons.

Fancy-Smancy Hair Dryer.
I knew you could heat up vinyl kit parts and reshape them, in theory this would apply here...  (BTW, make sure your wifey's hair tool gets put back immediately and in the condition you borrowed it or else it will be frying pan time.)


Heat...
This one gets really effing hot, so be careful.


Yes-Fit.
See, I knew it would work all along.  (I cheated, I experimented on a scrap resin part beforehand).

Awww...No-Fit.
So now the two sections fit to the model, now they need to be shaped to fit each other.

Apply Heat.
Direct heat to small sections at a time.  Don't melt your model.

Yes-Fit Again.
I like it when all the parts fit together.

Mark Position.
Now some manly-man work.  I am going (notice I did not say "We") to run a 440 screw up into the foot of the model to attach her to the base.  I do this for a number of reasons: 1) mechanical bond is more secure than glue bond, 2) I can remove/attach model at will for construction and painting and 3) Once model is completed attaching via screw is much less nerve wracking.

Be Mindfull.
I have built a number of female resin kits over the years and attaching them to a base mechanically and hiding the attachment is always tricky.  This is because female models are pretty much always wearing heels so the useable surface to attach them is quite small.  Additionally, there is always a large mass of resin  up high to hold up.  And the shoe is bent.  I've drilled the hole (using a drill press so it's straight) and pushed the 440 screw through so you can see what I'm talking about.

Mark Depth Using Tape.

Drill.
I then tape the model to the base over the hole (use your pencil lines) and carefully drill using a tap size drill for a 440 screw (#43 or .089 thousanths).

Look Ma, No Hands.

Support Rod.
BONUS!  Here's the support rod I am adding to hold up that ridiculous headdress.  I mean come on- this thing is just wacky!  Again, this is just me...I work with resin every day and seen it sag over time. Maybe this just makes me feel better, but I'm going to run a brass rod right through her head to add extra support.

That's Gotta...Nevermind.
Again, My friend, Mr. King (we are FB friends, so it's official) has made it easy for me to do this. Like before, measure the rod, pick the correct drill bit and DRILL.  (BTW, I have all my music on shuffle, it's making me a little edgy).

Drill Into Neck Cavity.
Badda Boom Badda Bing.
While "We" Are At It...
Let's just go nuts and drill up into the top headdress.  Yes, take a look at the built up pic again, this thing is freaky big.

Infrastructure, Baby.
New Base.
Going to reattach Queen to new base.  Position...

Drill.
One hole gets her attached.  The other holes are are under the petals of her skirt.  I am going to add attachments on them to keep them in place.  I think.  We shall see.

Infrastructure...Check!
Infrastructure of model is now locked in place.  I did some tweaking of the skirts shape with the blow dryer to make it more curvaceous.  (The note card in the opening is a shield to keep the heat off the legs.)

I'm cooked, see you next time!  BTW, I did finish my entry for Massive Voodoo's Mad Max 2 contest:

Cheers!

Tuesday, April 26, 2016

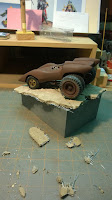
Rust Bucket

Must finish by end of the week!  So far:

I save chunks of dirt, rock and roots.  This is some concrete that sloughed off a building.


Arranged on base.


...adding a highly modded 75mm figure.


Changed my mind about the jet engine.


As of 10 pm last night.  Cheers!

This model is for the Massive Voodoo Mad Max Car Contest, Issue 2.

http://massivevoodoo.blogspot.de/2015/11/mvs-mad-max-car-contest-issue-2.html