OMG, ready for more punishment?
Here's that main landing gear swing arm from last time, part 8. One end has been cut off.
This is the side with the tire. A 1/4 styrene rod section is glued on using Weld-on.
The outside is sanded flat.
The inner section is cut away.
The inside of the arm is sanded flush.
Ready for casting. I'll need to do a lot more to get all this to fit together, by making a casting I have free licence to hack away on cloned parts.
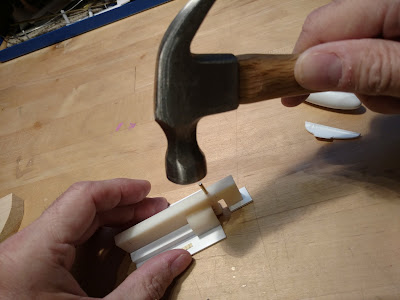
I try to bundle up my casting. This means more parts. This is a tool I made to emboss a diamond tread detail onto the tire.
The tire is pressed on. Equal distant tick marks are Sharpied on. The tire is turned on tick at a time and gently whacked with the hammer.
Like so.
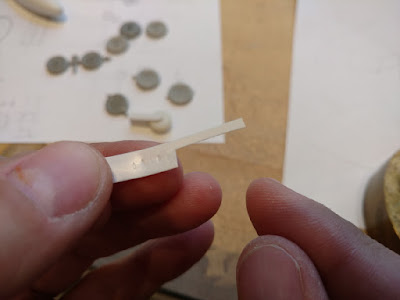
On the lathe I slice off the ends so the pattern is in the middle.
Two sidewalls will be cut and added.
The Snuka has a large under chin blister for the front landing gear. Right now it's important to get all the gear sorted out to get it's stance. Then back to the rest.
Basic shape is cut out in thick ABS plastic.
Basic shape is cut out in thick ABS plastic.
The pattern is smaller because I'll be pulling .100 thick styrene over the top. Here is the pull cut out. I wanted a shell (there is guttiworks in there) and the thickness will allow me to shape more easily.
To match the fuselage contour, sanding paper is attached to the nose and the blister is sanded to fit.
OK, so here is where things get a little weird. What you are looking at is a mold to cast the swing arms. The part has lots of fragile parts and in order to keep these intact during de-molding I chose to create five inserts. What you are looking at is two walls of the mold before completion.
This is a pretty tricky mold, but most of the fun is figuring these things out and stretching my mold making skills. Here you can see the funnel and sprue. I build molds upside down, so you are looking at the bottom.
The cured silicone mold with all the inserts pulled out. This mold will get sliced open on one end so cast parts can be removed (I don't have a pic, I'll take one so you can see).
I made another mold at the same time, this is to cast the landing spat, gear doors and tire.
It gets cut open like so. The slit goes down to the bottom, but not all the way through.
Like so. The uncut bottom acts as a hinge.
Here is the first resin castings. Rubber bands are used to hold it together.
The parts.
Here you can see the spat and landing gear doors. Being clones I can slice and dice at will.
The first casting from the swing arm mold. Later casts were complete.
One of the spat clones is cut, then a second...
All the bits are carefully sanded and it looks like everything will even fit...
That's it for now, this Oscar is tired. See you in part 10!


