

In model building it's important to rehearse the drama to ensure all the actors are working together. It's mildly thrilling after weeks of coaching, blocking and flubbed lines to see a coherent performance emerge. This is a story of a scale replica Model-T touring automobile, circa 1910.

Now that all the core parts are interacting well, it's time to sort out some of the details. I like to pick out a few and enhance them. Here is the kit supplied Acetylene Generator. The Model T was equipped with Acetylene head lamps, a very high tech feature for the time. ICM's version of it is molded in two halves. I always have issues with two half round bits meant to be glued together to form a fully round bit. I shaved of the clamp detail and was going to reapply it (this creates an undercut). I then glued a rod on the bottom so it could be chucked in my drill. A file and sandpaper could then be applied to the spinning part. However, after looking at reference, I decided to take another path.

Here is a reference photo. There is a bit of divergence between the kit part and reality. It's polished brass, perfectly round and the top half is clearly a lid.

I made a new one with sections of styrene tube. The top half is a "lid", held down by two thumb clamps. The clamps are made from Tichy "wingnuts", with one of the wings cut off. For more on the Acetylene Generator go to: https://www.modeltcentral.com/Model-T-Ford-Lighting-Systems.html It was important that you could tell it had a removable upper section. I think you can see this from the new part.

For me modeling is about three things: Craft, Learning & Discourse. Oh, uh four things - Nostalgia (Yellow, no blue....Aaaaaggggg!). Anyway, the "Craft" part is usually where I spend the most time so I usually listen to music. I bought a Bluetooth turntable just so I could listen to this.

Ok, lets talk about the horn. Here is a nice pic from a Model T restoration catalogue. The catalogue helped me figure out some of the details that ICM missed or simplified. To activate the horn, the driver vigorously squeezes the bulb.


As an aside, I have a number of bins, each dedicated solely to one type of material. Anytime I come across something, I put it in the bin. You never know what will be useful. This bin is for any kind of string, cord or wire. When everything is together like this, when you go to find a wire, you often come across another that you hadn't thought of, because they are all together.
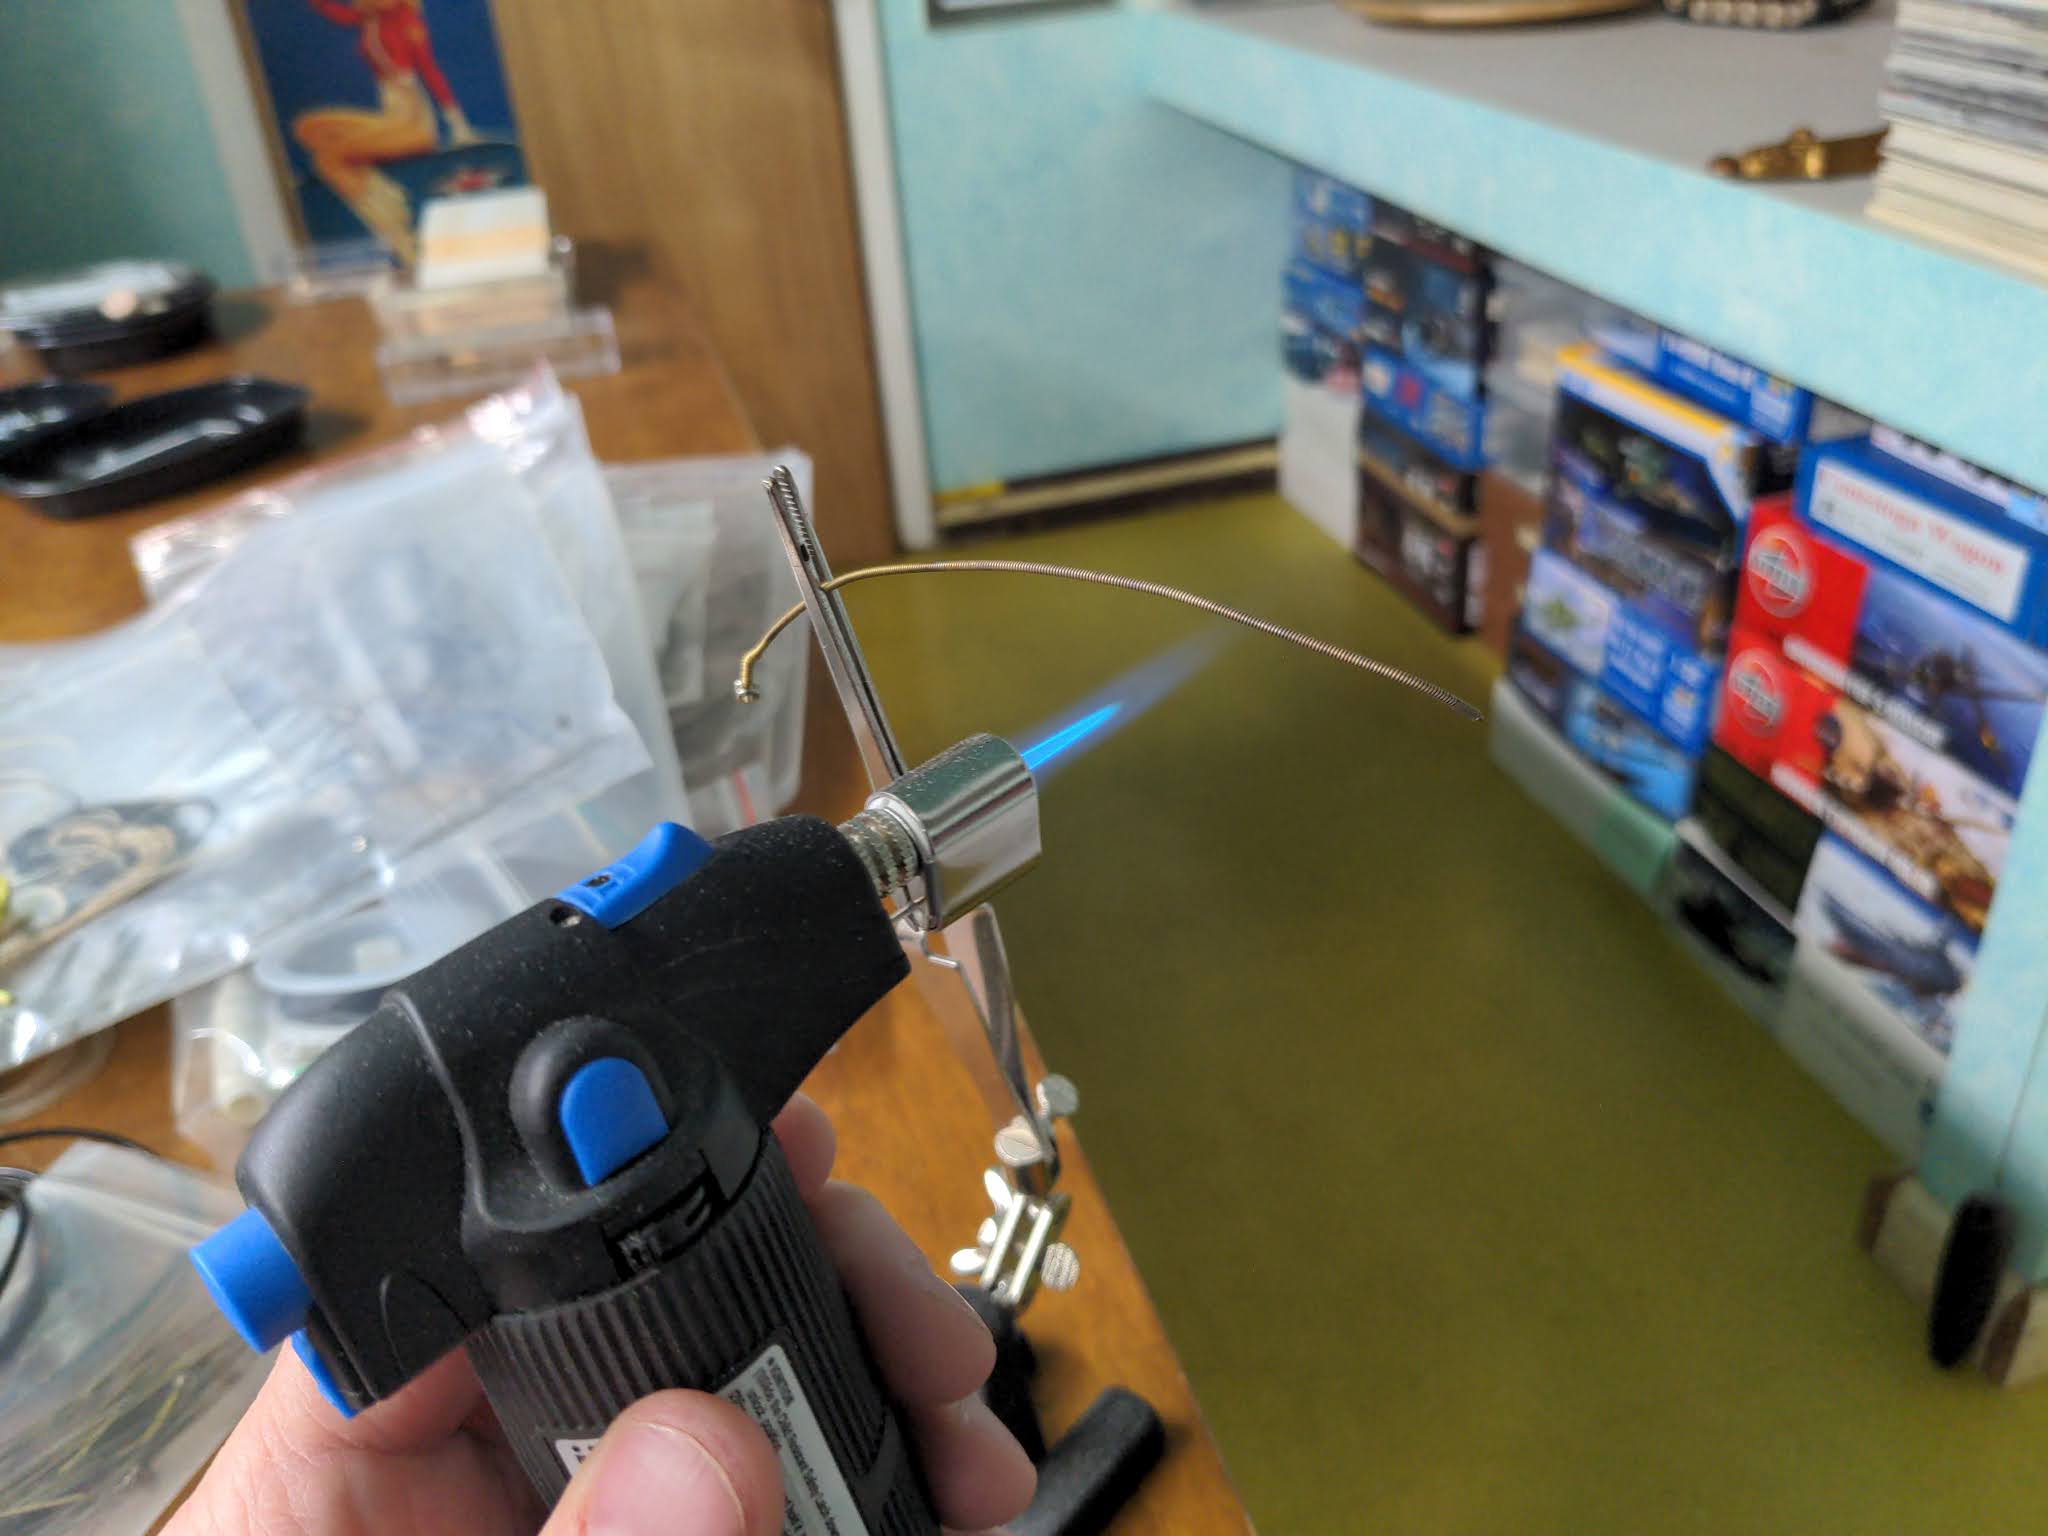

Round nose pliers are used to shape it.

Here it is resting in place on the model.

I also listen to podcasts. This is my new favorite. Here is a typical quote: "we're in lots of places...like eczema" or "...I am so excited...it feels like I'm getting on a slow dreadful rollercoaster". If you are NPR intolerant, this pod cast may cause a rash and swelling.

Another run through, it shows that the horn and the lantern bracket want to occupy the same space.

The pencil lines show approximate locations of the brackets. I then use calipers to gently scribe lines so that the new mounting locations will be symmetrical. Note that the holes are drilled to accept a pin on the center of the bracket.

A really swell shot of the adjusted relocation. I like putting pins in, it makes life easier once the final paint is on.

Time to get some primer on this. I use bamboo skewers, you can twirl the part 360 with your fingers while painting. And yes, I work on multiple projects at once. In the background is an unsorted MOC Lego Gigahorse.

A swell pic of me painting, using my new camera rig made from broomsticks. My paint booth is portable. It fits underneath my table and it can be set up in 10 seconds to paint.

My Hobby Club comrades made fun of me when I bought this. It's a GSI Creos/Mr. Hobby tool for opening stuck paint jars. Go ahead, laugh.

Silicone gripper and a wrench (the other side is for Tamiya paints). Who's laughing now?

A swell view of my work area. Right now I am set up to take the Model T pics.

Here are the above mentioned pics. Need to work on lighting...and depth of field.


The detailing really helps.

Another thing I have been listening to.
Time to call it. That's it for now. Happy Modeling!
The details on this model are amazing. Good luck on the painting part in the near future. As for podcasts, I'm starting to love them. Currently I'm listening to "Star Trek - The Pod Directive".
ReplyDelete