
From Wikipedia: "Some 50 servicable Bf 110s took part in Operation Barbarossa from
two units; Zerstörergeschwader 26 and Schnellkampfgeschwader 210.
The Bf 110 gave valuable support to the German Army, carrying out
strike missions in the face of heavy AA and ground defenses. In the
opening air strikes, on 22 June, SKG 210 claimed 344 Soviet aircraft
destroyed, more than any other unit, for the loss of 7 Bf 110s
destroyed and damaged. A large number of ground kills were achieved
by these Bf 110 units in the east. SKG 210 flew over the Central part
of the front supporting the German army's encirclement and
overrunning of Russian land forces in the Białystok and Minsk areas
in the early phase of the campaign, and flew in support of the
advancing Army Group Center advance to Moscow in 1941. Between 22
June 1941 and 26 July 1941 the unit claimed to have destroyed 823
Soviet aircraft on the ground and 92 in the air, 2,136 vehicles and
165 tanks destroyed for 57 Bf 110s lost to enemy action.


With the coming of winter SKG 210 continued to operate in support
of the army, covering their retreat."

This is the 1/32 Dragon kit. The kit is a C7 (a very odd version), I modeled a C4.


This is the 1/32 Dragon kit. The kit is a C7 (a very odd version), I modeled a C4.

Overall a good kit. Nacelles are pretty fiddly and the complete engines render it impossible to get them on without a lot of grinding. But what is modeling without grinding?

The central bomb rack anti-sway braces were a mess. After spending several hours on them, I just pushed them all the way in. Totally not correct, but my patience was depleted.

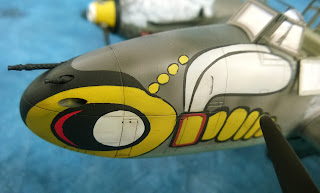
The markings are all painted on using Montex masks.
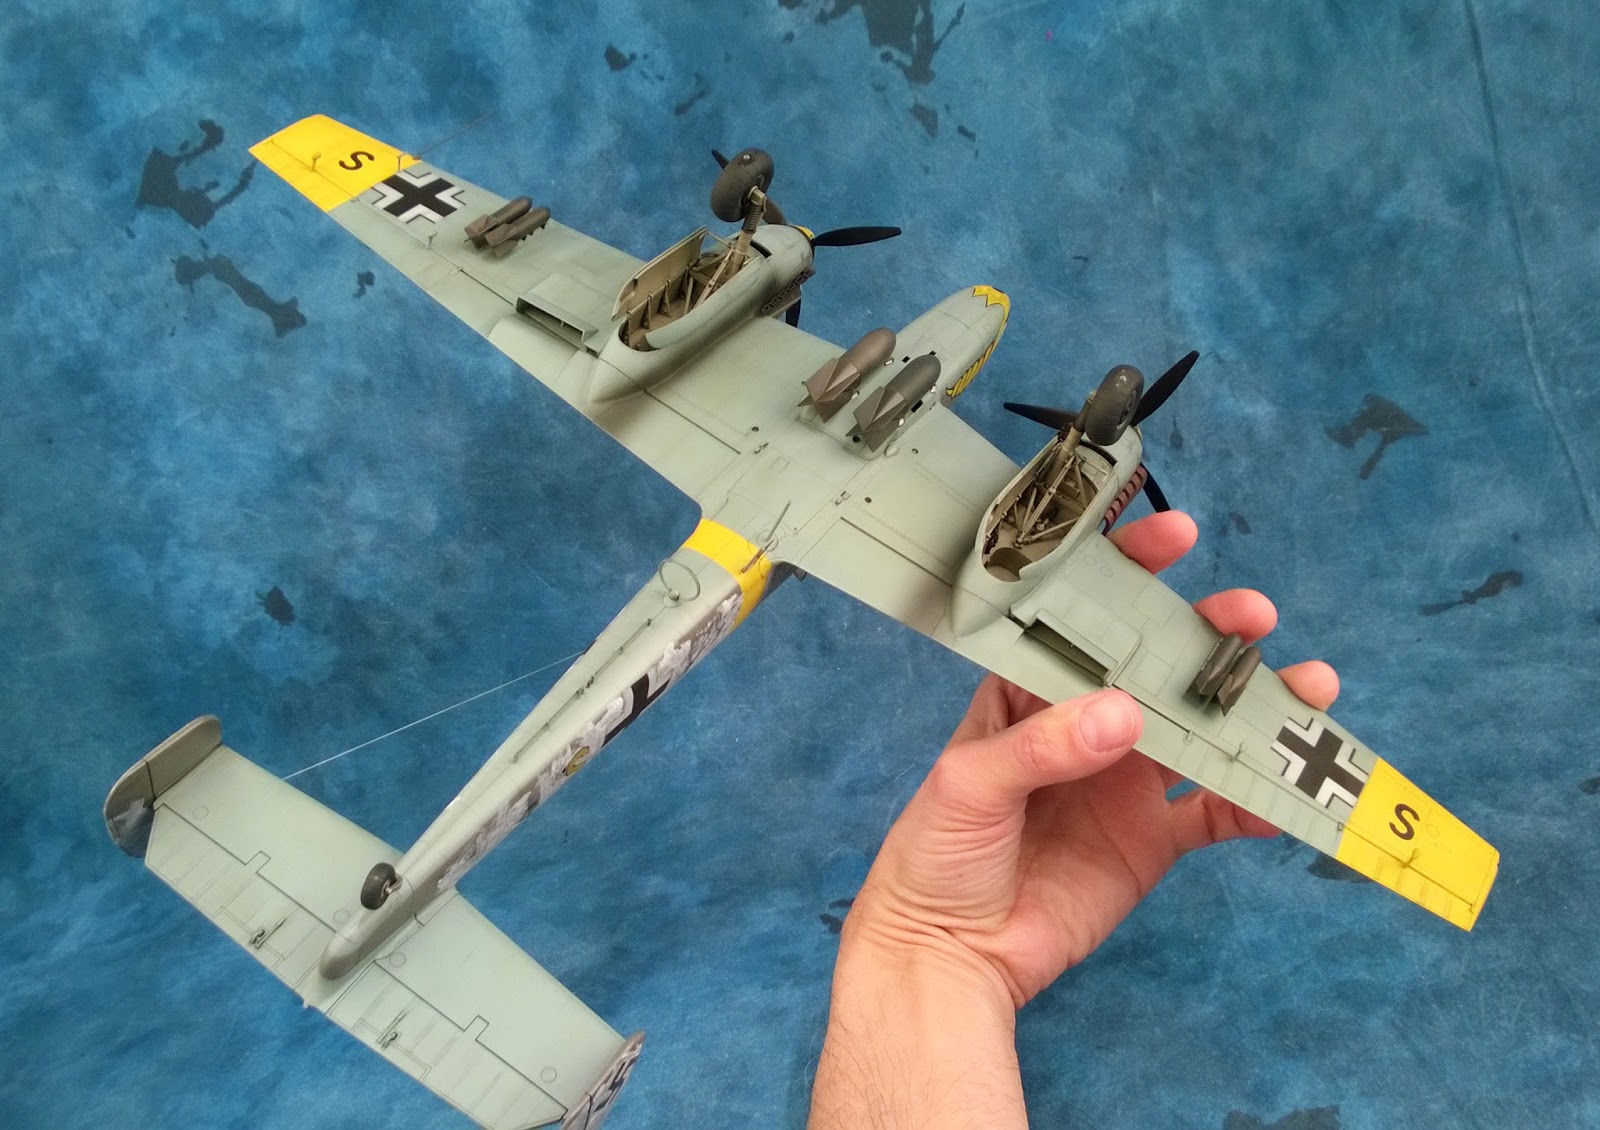
The bottom showing off the purdy ordinance. Gotta love ordinance.

I used a detail brush to add a few paint runs.


Here it is all done-done. Going into this I thought it would be an easy project, but as always things seem to snowball out of control. Maybe, just maybe there is no such thing as an "easy" project. If I were delusional, would I know it? Questions probably inappropriate in a blog post about a Nazi warplane. The kit is basically OOTB. I recast the plastic tires in resin to create bulges. They are at angles and turned out to more tricky than I thought. Bottom color is Tamiya XF-23 hellblau. Upper surfaces are Gunze Aqueous RLM 74 and 75. Both appeared identical in the bottles, but as you can see look very different on the aircraft. I love dirty stuff, that was why I picked this AC as it had a nasty looking whitewash slopped on it. To apply I used the hair spray method. First, I brushed on the hair spray right from the bottle (Tresemme). After a few minutes I brushed Tamiya flat white over that being mindfull to simulate the sloppy brush strokes of the overworked groundcrew. I then used water and a toothpick to remove the whitewash from high use areas. It is my understanding only the sides of the aircraft were camouflaged, as these were the areas visible during low level ground attacks. As far as I can tell, from the photo, there is no whitewash on the wings. Of course the wasp emblem is left uncovered for esprit de corps. I cut masking tape stencils to paint the emblem. The hardest part was not the cutting, but the positioning on either side of the nose so both sides matched. Enjoy!
Next time:

Next time:


