
Picking up where we left off:

The tank has a simple structure with eight "stringers" that the outside of the tank will be glued to.

A sanding block was used to flatten the top and bottom.

The bottom comes with adhesive and is stuck onto the bottom of the tank. The slots are for the support beams underneath.

I added a block of balsa where the water feeder pipe goes. The balsa will allow me to drill a deep hole for a pin in the feeder pipe.

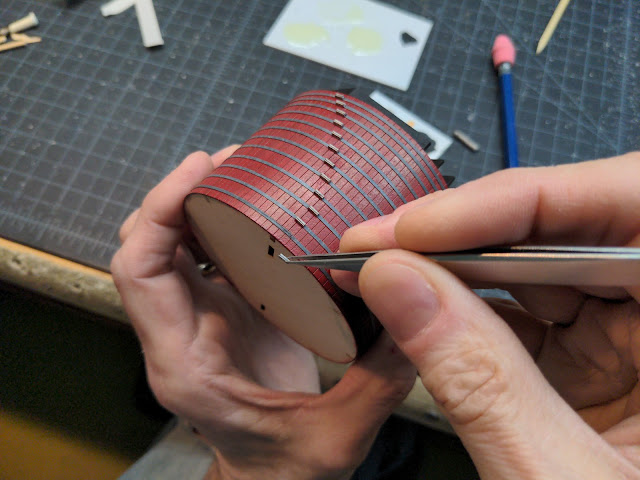
The tank exterior is then wrapped around the support structure. This turned out to be a bit harder than I thought, I would have added more structure underneath to keep the thin plywood from bowing inwards and allow for more surface for gluing.

A view of the completed elements. The beams of the tank bottom are meant to be glued to the support beams. This seemed a bit crazy to me...there is not a lot of gluing surface and there are no locators to get the tank on centered. Everything would need to be painted first...

I used tape to lay out where the beams would be, did a lot of measuring and then drilled .040 holes in both the top and bottom.

This is a bit further on, but you can see the pins to connect the the top and bottom.

I brush painted the black.

The metal straps that go around the tank are self adhesive. I painted these with a grey color and streaked them so they would look like rusted metal.

A guide is supplied to get the positioning of each strap.
The turnbuckles are supplied as a soft metal strip which is cut into segments and glued on.

The roof shingles are made up of adhesive strip which is cut to size and stuck on.

The finished roof.

I painted the tower base, the water based paint made it curl. I needed a better base anyway, so...

I made a thicker one from black plastic and MDF. I needed something to handle the miniature with as I built it and it would also allow the client to get it home in one piece.

I built all the details next and and painted them black.

The accent post was shaped from plastic rod using my drill and a file.

Braces are glued to the ladder.
Here is the final result:


The client picked it up last Sunday. I cleaned off my table...
No comments:
Post a Comment