Pages

Tuesday, August 8, 2017

Oscar Goldman & Ninja Cat Build The DMB-87: PART 6

Nationals all done, funds exhausted, basement almost tidy...time to for another dumb header:


Last we left off I got the basic fuselage knocked out. The fuse attaches to the MDF bar for machining, I decided in my finite wisdom to cut the bar. The wood glue is to glue it back. The post in the bar fits between the tail spikes to hold it on center.


Illy is used to create tail outlines, I stretched them because they are foreshortened in a top view.


They are double-stuck to a jig to create 23 degree angles.


These are scrapped.


New set, The holes are drilled before they are cut out, they are used to realign if I need to put them together to cut something. Notches on the ends are for the Garmillas protuberances.


I cut more positioning blocks to make sure everything is lined up.


Holes are drilled in tails while together and edges square.


Then 23 degree angles are cut.


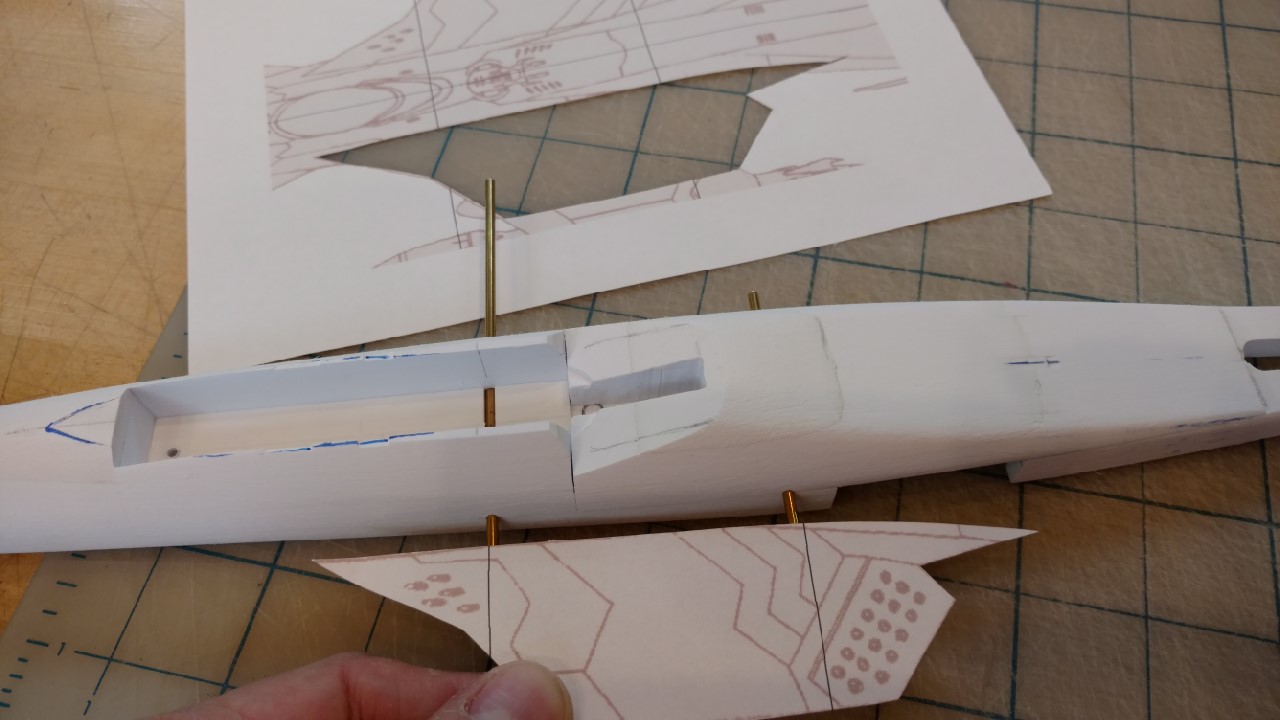
Paper templates scale the wing roots.


Sharpen the ends of the brass pins to scribe a line on wing.


Drill holes.


The pure music of infrastructure.


I attach fuse to the MDF rail in order to mill the areas where wing roots attach flat for a nice fit.


Basic shape of wing traced.


On the model. Now that these dimensions are set (no details yet, they only cloud the mind), time to think about other wing areas.


There is ordinance and the racks to consider. The rest of the wing and those pesky spatted landing gear.


That's it for now, until next time (soon, I have still a lot of catching up to do here).

Friday, August 4, 2017

Omaha 2017 IPMS National Convention


Last weekend I joined other humans in the Midwest to celebrate the Joy that is the building of plastic models. Here follows is a scale representation:


Four of us made the 8 hour drive, we were not sure how we were going to get our purchases home. This is the advantage of being typically male, as a future problem "this would simply solve itself". Onward! (&BTW, it did).


These places for the masses look best in the morning after coffee. For about 6 minutes.


One of the "Sprue Brethren" schlepping unassembled plastic goodness.


The contest room on Friday.


Typical of the vendor wares.


Vendor display of Nazi plywood Horton in 1/32 scale.


One of my purchases. I have others in the series. Sure, laugh it up fuzzball.


This was a seminar that I visited on building real space craft. I gave a seminar myself on resin kits. Fun and well attended. Uh, this one. Mine? Huh.


The nice folks from FSM had an advance copy of "Out Of This World Modeling". SHAMELESS PLUG: I have a model featured in it, this will be out in the fall.


Had this at the Sack museum.


OK, here are some models:


Here is a white car, presumably driven by Romy.


Helicopter.


Robot Spy.


Eindecker.


Claude.


Submarine, Yellow.


Bloodsucker.


Our "Group Build", F-4 Viet Nam Phantoms. Mine is the gray one. (We got 3rd place!).


After the awards ceremony we grabbed our models and scattered like rats.


Thus endeth another scale modeling event. We return to regularly scheduled blogness in our next installment. Plastic is dead. Long live Plastic!

Monday, July 17, 2017

Oscar Goldman Builds The DMB-87: PART 5


In this installment we welcome help from B. Page.


A view with more of the plastic bits ground off. By constantly comparing it to the 1:1 print out of the blueprint it is possible to keep fidelity to the original artwork.


A cutout of the canopy dimensions has been placed on the model to visualize how that section is going to get made. Still figuring that one out, but I have some thoughts.


Using Illy I draw the cockpit. The placement of the pilots is done by reviewing the animation. The rear pilot is only partially seen in the episodes.


It's cut out 1:1...


...and placed on the model.


If you recall, space was left for the cockpit tub, three sections of .25 styrene is dropped in and cut to shape. A notch is cut for the placement of the rear ball turret.


The idea is to cast the fuselage as one part so I put into one of our pressure pots (used for resin casting) to see if it fits. Tight, but it will work.


More shaping of the fuselage, this view shows the bottom. Note the strake and engines.


Wing is part of the fuselage. The various slots in the fuselage sandwich are for these brass pins that will locate and support the wing. Here is a paper template of the wing to get this part rolling along. No detail gets added until all the basic structures are in place.


Here it is with paper wings. A lot of colluding lines and bulges. Everything has to get built at once so they interact properly.


Vaseline is brushed onto the fuselage (here it is taken apart).


Apoxie Sculpt is then used...


To fill in the void behind the turret.


Dry and sanded. The Vaseline keeps the Apoxie Sculpt from bonding, so that it can be removed if needed.

That's all for now. You can see me at the IPMS Nationals in Omaha. I'll be giving a swell Demo at 2pm on Thursday on resin kits. Hope to see you there.